- Home
- Parts by Type
- Parts by Bike
-
Installation Instructions and Videos
-
V-Strom Parts Instructions
>
- Mirror Extender Instructions
- Fork Brace Instructions
- Footpeg and Control Lowering Instructions
- Gear Shift Relocation Instructions
- Bolt-on Kickstand Foot Instructions
- Raising and Lowering Links >
- Shelves and GPS Mounts >
- DL1000 Rear Wheel Spacer Instructions
- Vee2 Saddlebag Guard
- Fender Riser 2014+ DL1000
- 2012+ DL650Fender Risers
- Retrieving Missing Parts from the Cowling
- Auxiliary Lighting >
- DL800 GIVI Crash Bars
- General Electrical and Lighting >
- Brake Lines >
- Kawasaki Versys X300 >
- Yamaha Parts Instructions >
-
V-Strom Parts Instructions
>
- Shorter/Taller Riders
- Favorite Projects
- Adventure Motorcycling Links
- Frequently Asked Questions
- Contact Us
- Photos
- Specials and Promotions
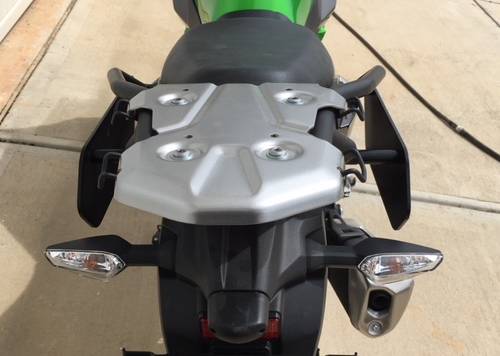
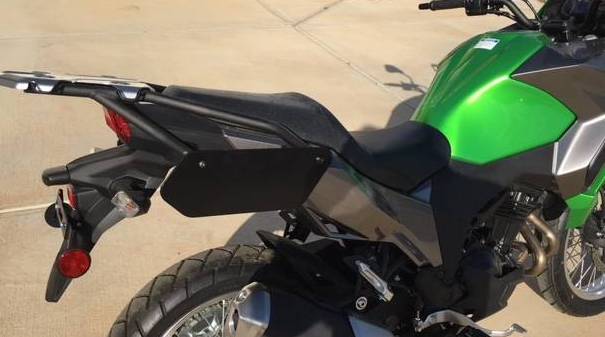
Versys X300 Saddle Bag Guard
Installation Instructions
Tools Needed - 5mm and 6mm allen wrench.
Work one side at a time.
Use of Blue Locktite or other temporary thread lock lock is recommended, but not required.
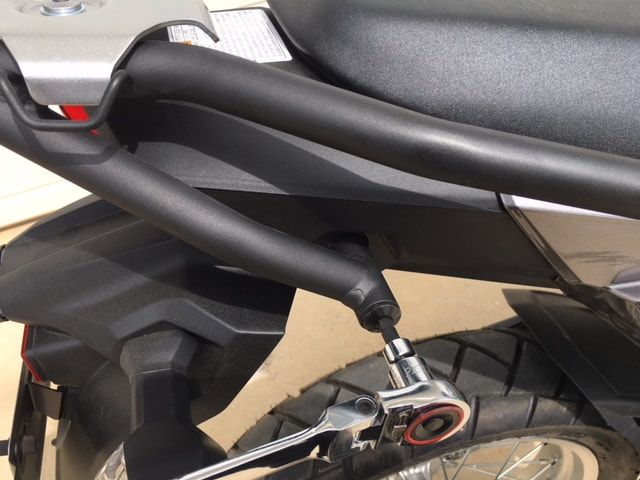
1. Remove rack factory front and rear bolts using a 6mm allen wrench. It may be easier to use a 3/8" drive wrench to obtain the necessary force to break the bolts loose.
|

|
2. Insert one of the factory bolts through the front 10mm hole in the saddle bag guard.
3. Reinsert the bolt in the front rack mounting hole.
4. Snug up the bolt, but do not tighten yet.
3. Reinsert the bolt in the front rack mounting hole.
4. Snug up the bolt, but do not tighten yet.
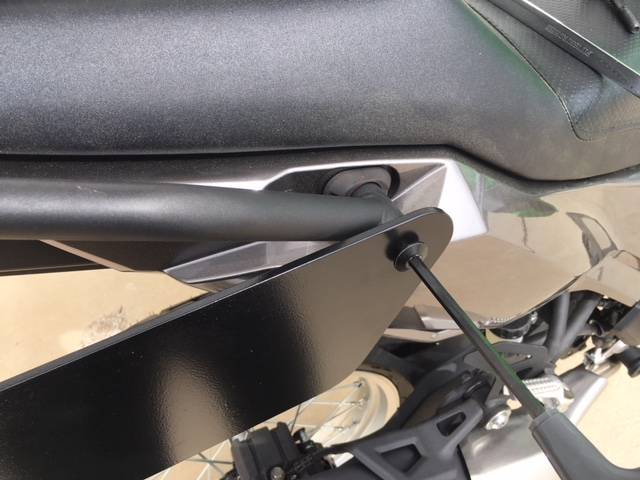
5. Place new black washer on 120mm bolt and insert through rear 8mm saddle guard plate hole and round spacer.
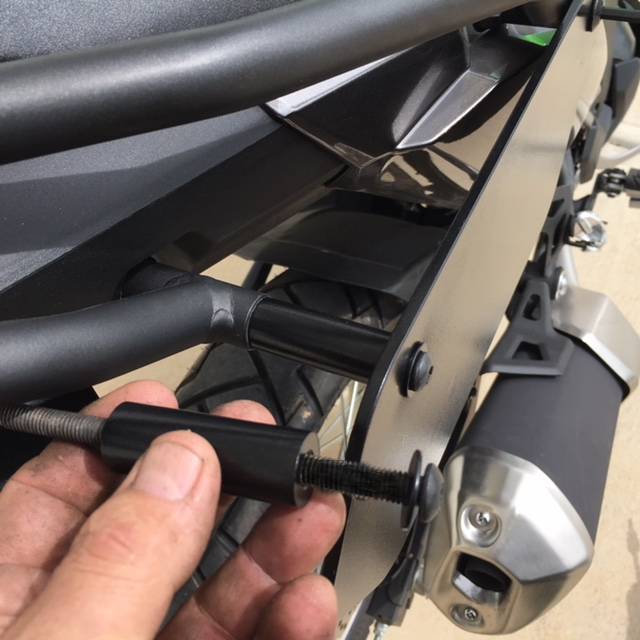
6. Tighten front and rear bolts.
7. Repeat for other side.
When finished it should look like this.
7. Repeat for other side.
When finished it should look like this.